

E-Commerce Distribution Business Guide
Guide for starting an e-commerce distribution business: learn about tech reliance and challenges, market research, legal considerations, and efficient route planning considerations.
Read More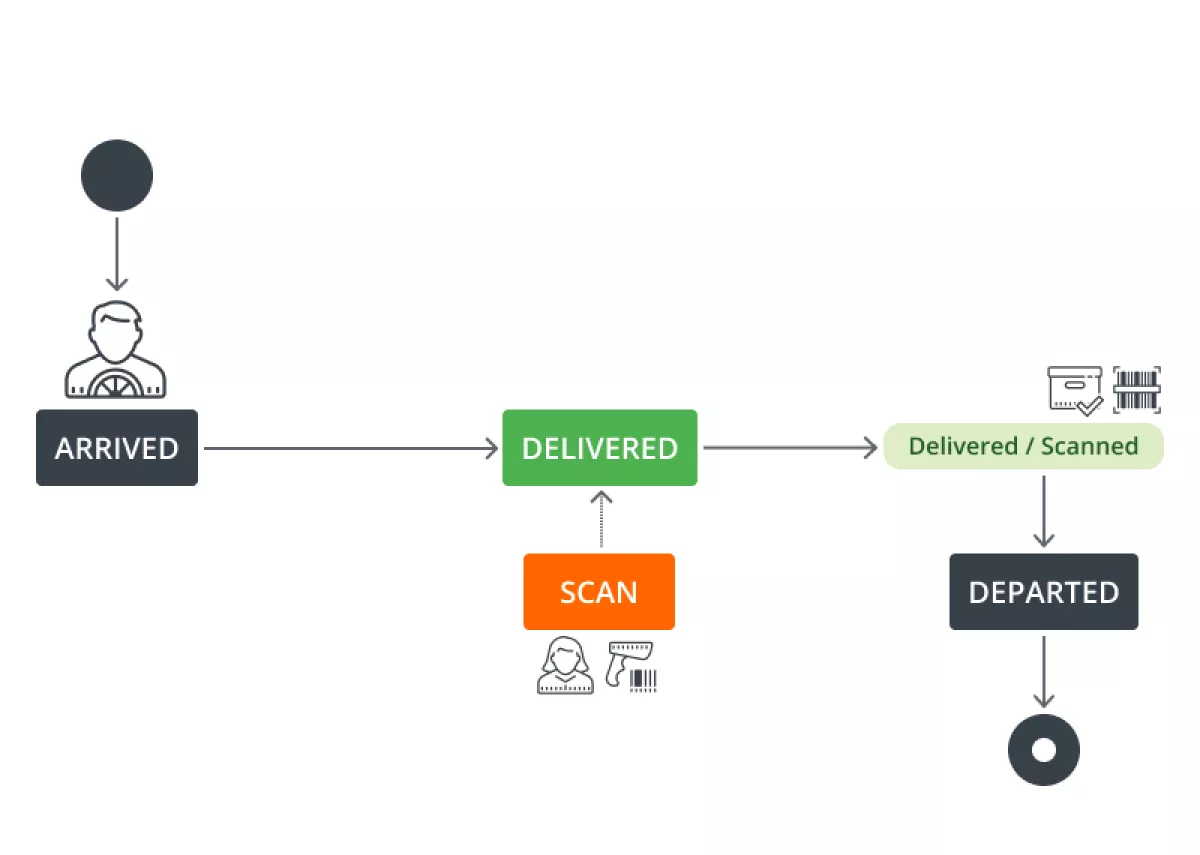
They say it's better to see something once than to hear about it a hundred times.
In this blog post, we visualize the most important processes in Track-POD last-mile delivery workflow: scanning, checking, and electronic Proof of Delivery (POD).
1. Load Check -> Sign -> Delivered

1.1 LOAD CHECK
The driver starts the route and passes the Load Check, where they confirm or do not confirm the fact of the loading of the orders. If the order was not loaded, it is automatically assigned the Rejected status.
1.2 IN TRANSIT
The driver has passed the Load Check and is on the way to the client's address.
1.3 DELIVERED / NOT DELIVERED
The driver arrives at the customer's address. Orders with the Rejected status after the Load Check cannot be delivered. For other orders, to confirm that they were successfully delivered, the driver gives their mobile phone to the customer for e-signature and feedback.
Then, the order is assigned the Delivered status and after passing all the points, the driver can close the route.
2. Scanning while Load Check -> Scanning on customer's site

The driver scans orders when passing the Load Check to confirm that they have been shipped, and then at the customer's location to confirm successful delivery.
3. Scanning of items

The driver scans all items in the order at the customer's address. After the process is complete, this order will automatically be assigned the status Scanned.
Now you know how we handle key last-mile logistics processes at Track-POD. If you're curious about our solution and would like to talk in more detail about how we could help your delivery business, book a free demo.
Guide for starting an e-commerce distribution business: learn about tech reliance and challenges, market research, legal considerations, and efficient route planning considerations.
Read More
Directories have everything your delivery operation needs. They put drivers, vehicles, clients, and more at your fingertips for faster setup, consistent data, and smarter routing.
Read More
Discover how cargo vans support diverse entrepreneurial ventures with their customizability and efficiency, perfect for innovative business models.
Read More